To find the acoustic tags we’re using three different methods. One is a passive method to see if the flounder are coming into the estuary, and the other two are active methods searching for the flounder out in the ocean.
1) Passive Hydrophones placed at the entrances of the Manasquan River, Shark River, and Navesink River.
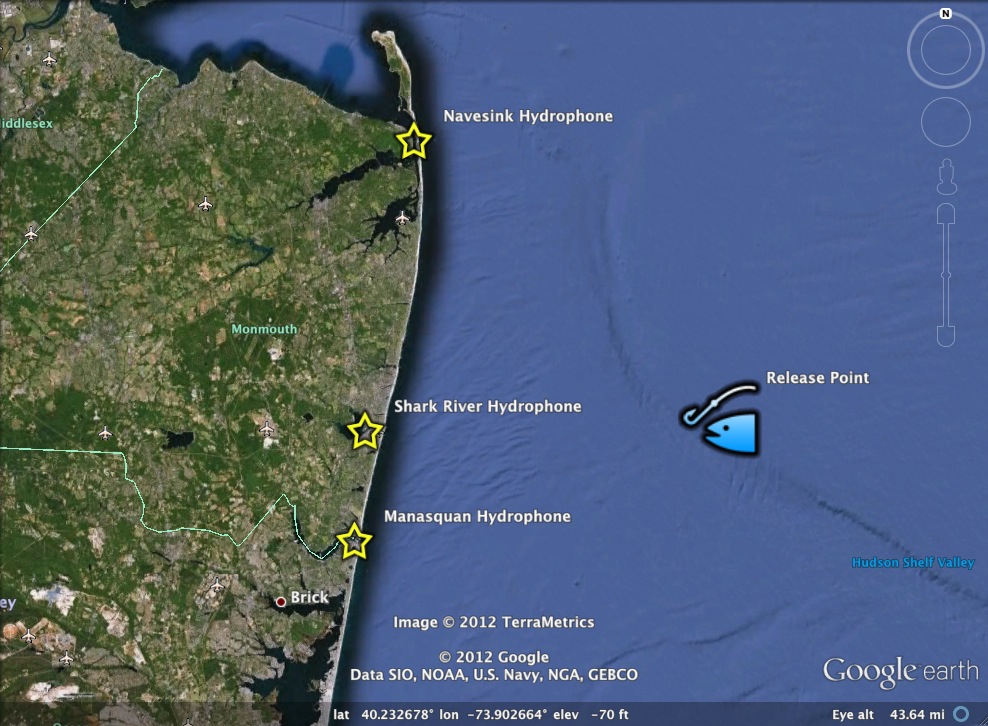 We’ve placed these hydrophones at narrow points in the rivers where the acoustic signal can stretch the whole distance across the river. This way if a winter flounder decides to come into these estuary areas, if they pass through that section of the river then the hydrophone will pick up the tag signal. Motz likes to describe them as working like an EZ-pass would with your car, if you drive through the array then the sensor picks up your tag. So much like we have these EZ-pass arrays on the major roads we’ve put hydrophones at the major rivers to track fish passage.
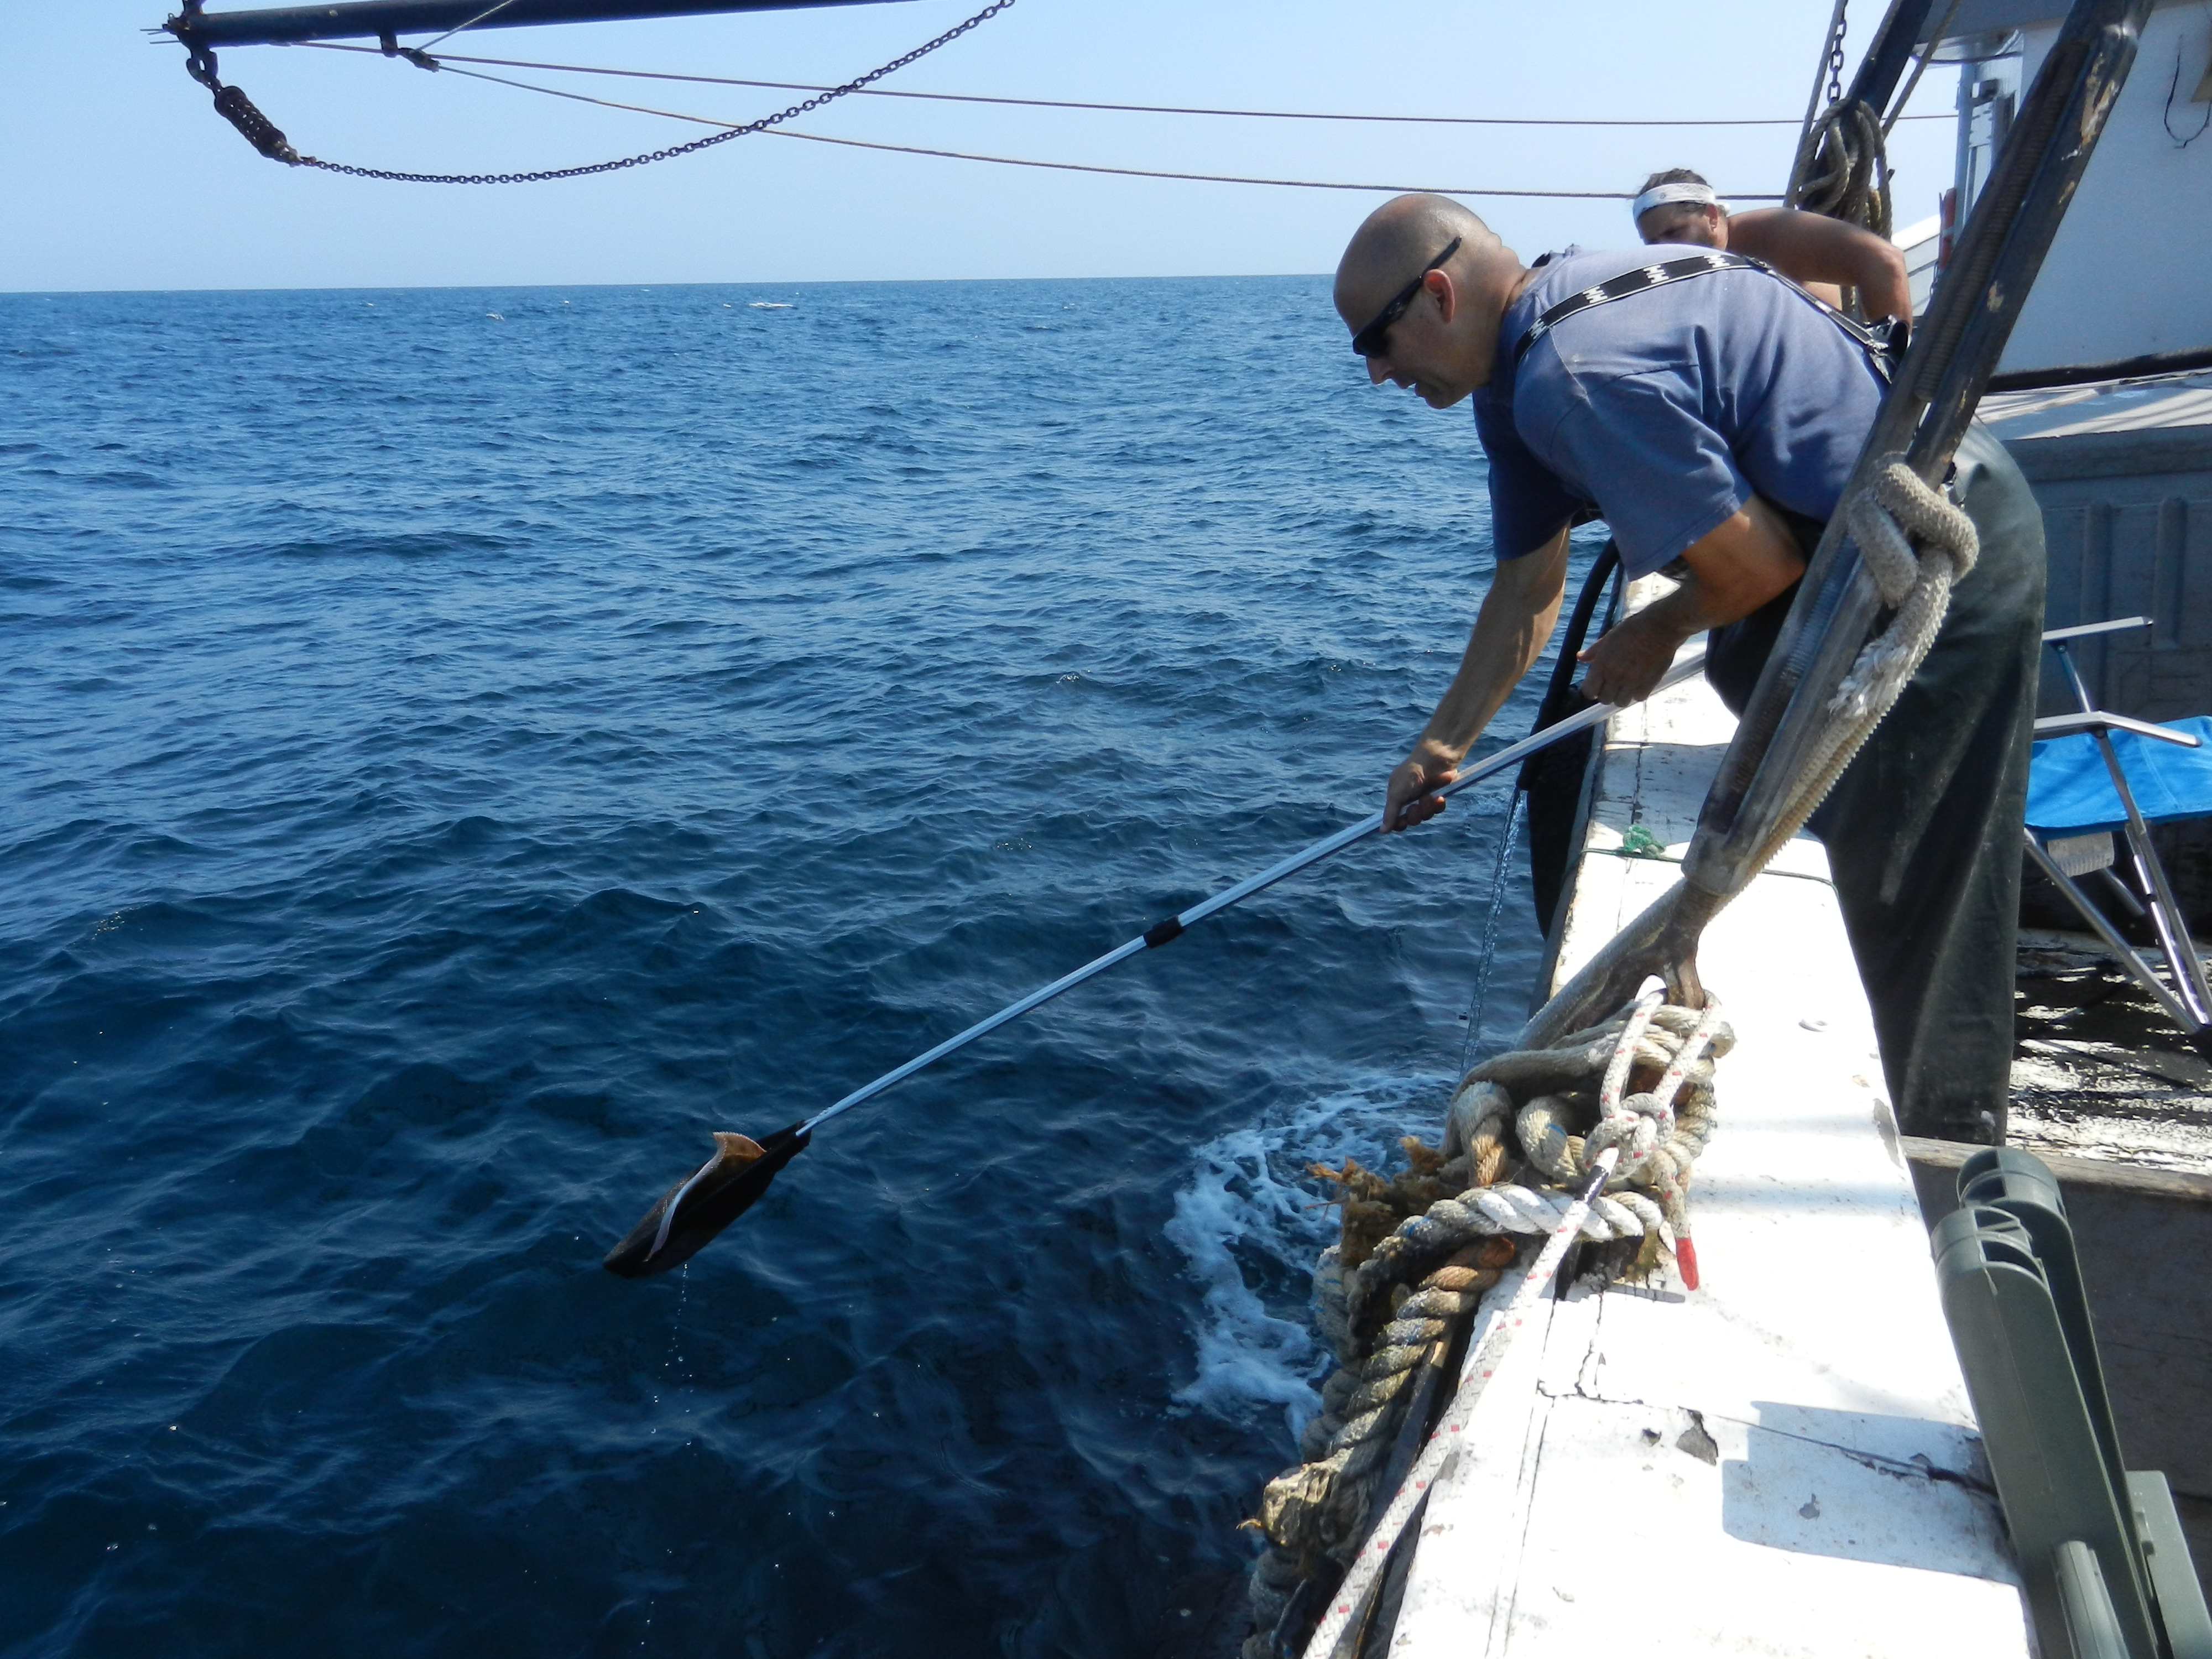
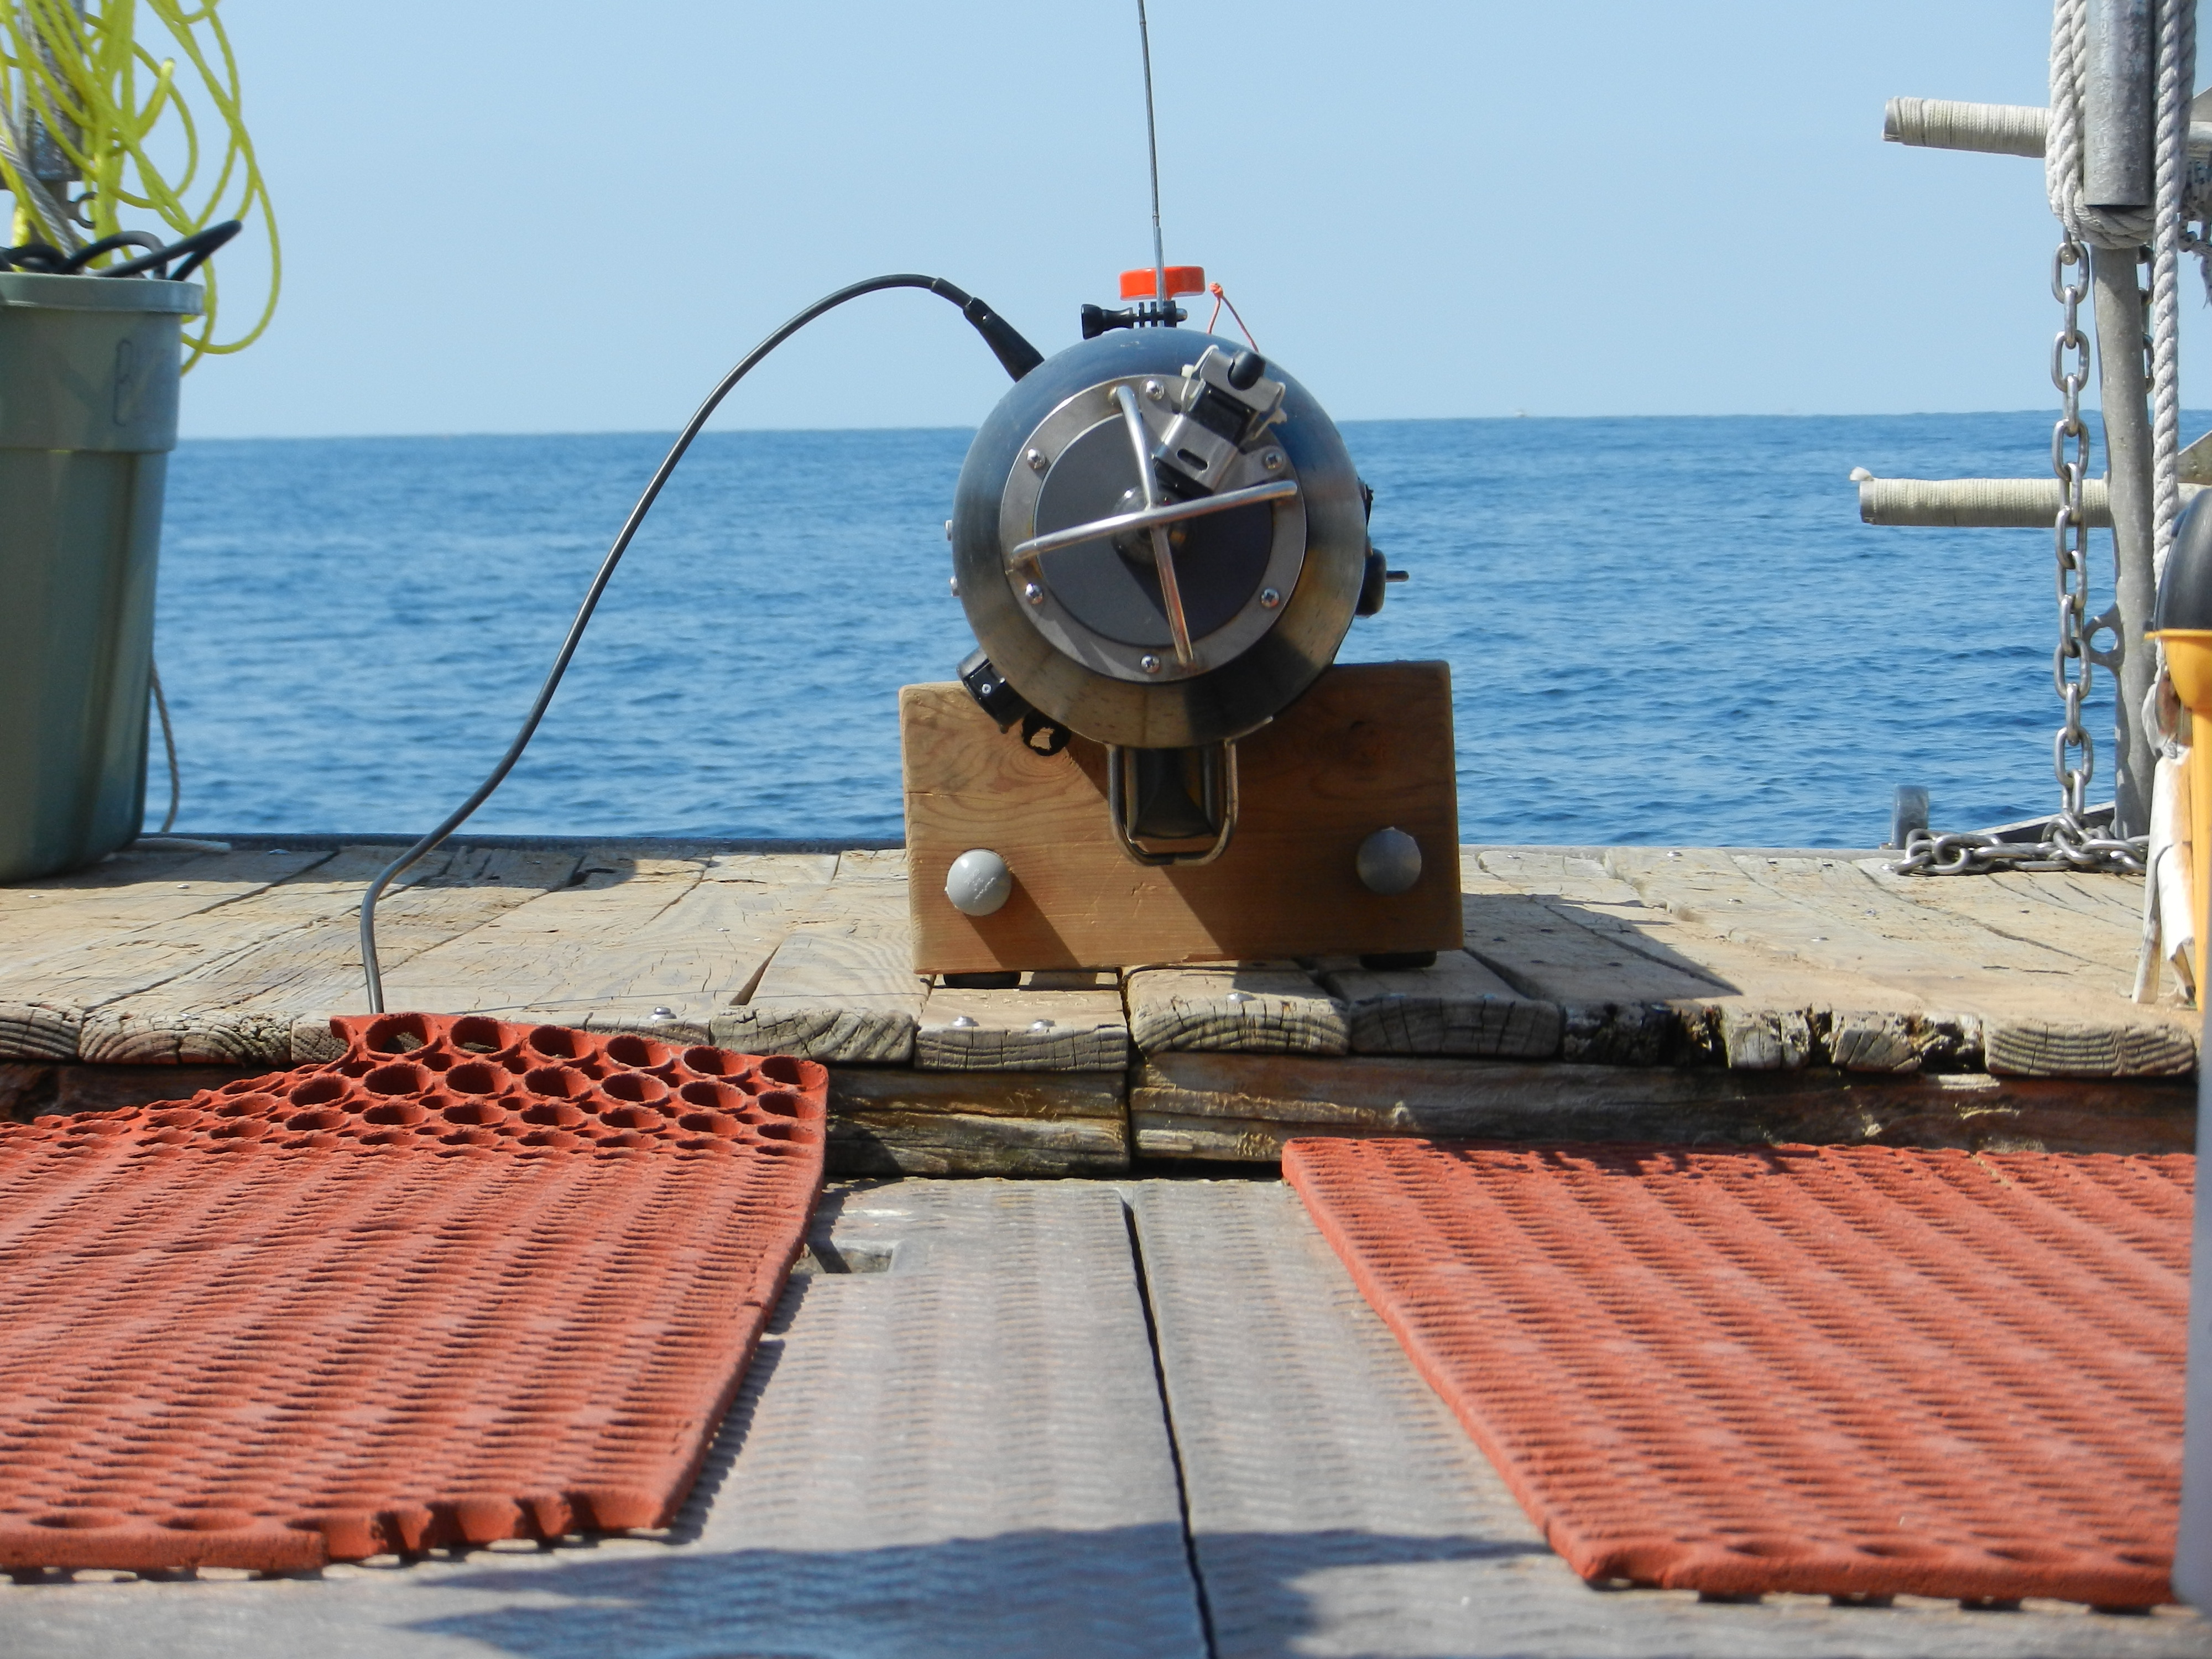
2) Actively searching for tags by towing hydrophones off the stern of a boat.
We’ve been searching an expanded area of where we deployed the tagged fish to see where they have moved over the last few weeks. The fish have dispersed outward from the drop point in all directions. Finding them out on the ocean shelf has already turned troublesome since the area has expanded and we can only cover so much ground. We tie a cannonball weight to the end of the load bearing rope coupled to the cable so that the hydrophone sinks trailing behind the boat. The rope gets tied to the boat, and then we just sit and wait for the hydrophones to pick up a tag. We drive the boat in circles, loops, or zip-zags about 500 meters or a little over a quarter of a mile apart to optimize how far the hydrophone can hear and to triangulate a position by picking the fish up from different angles.
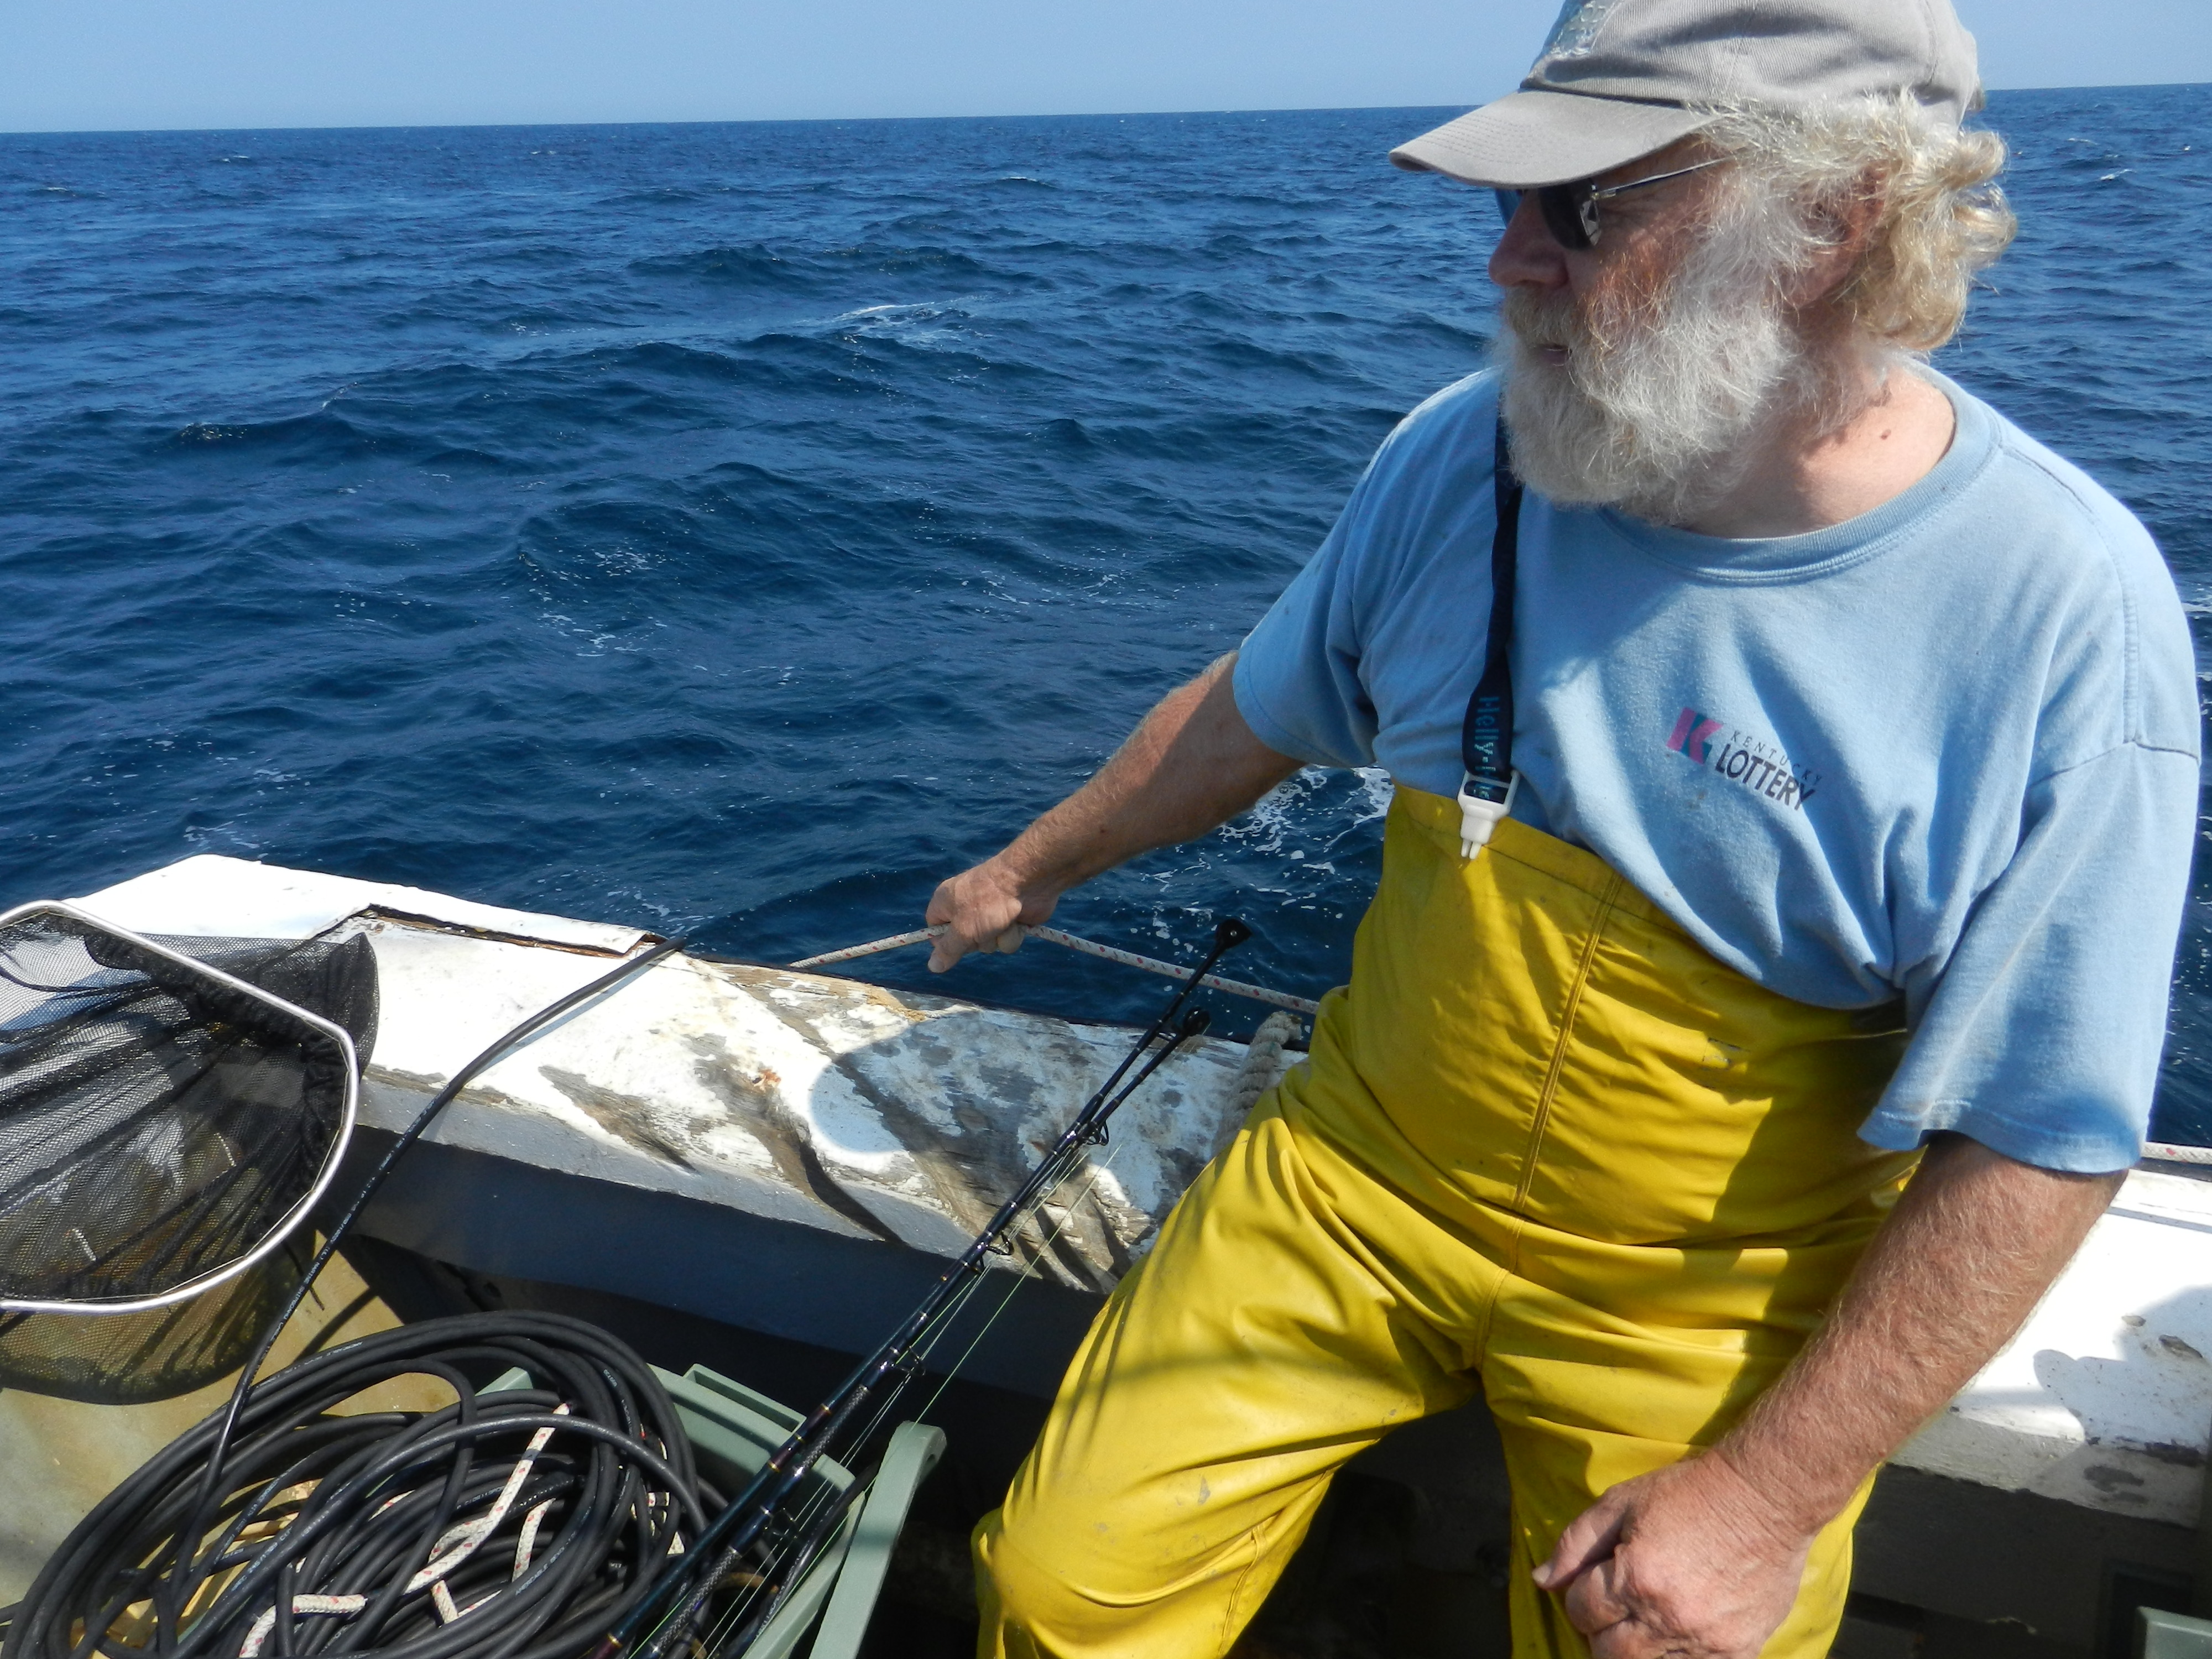
Ken lower the cable in the water
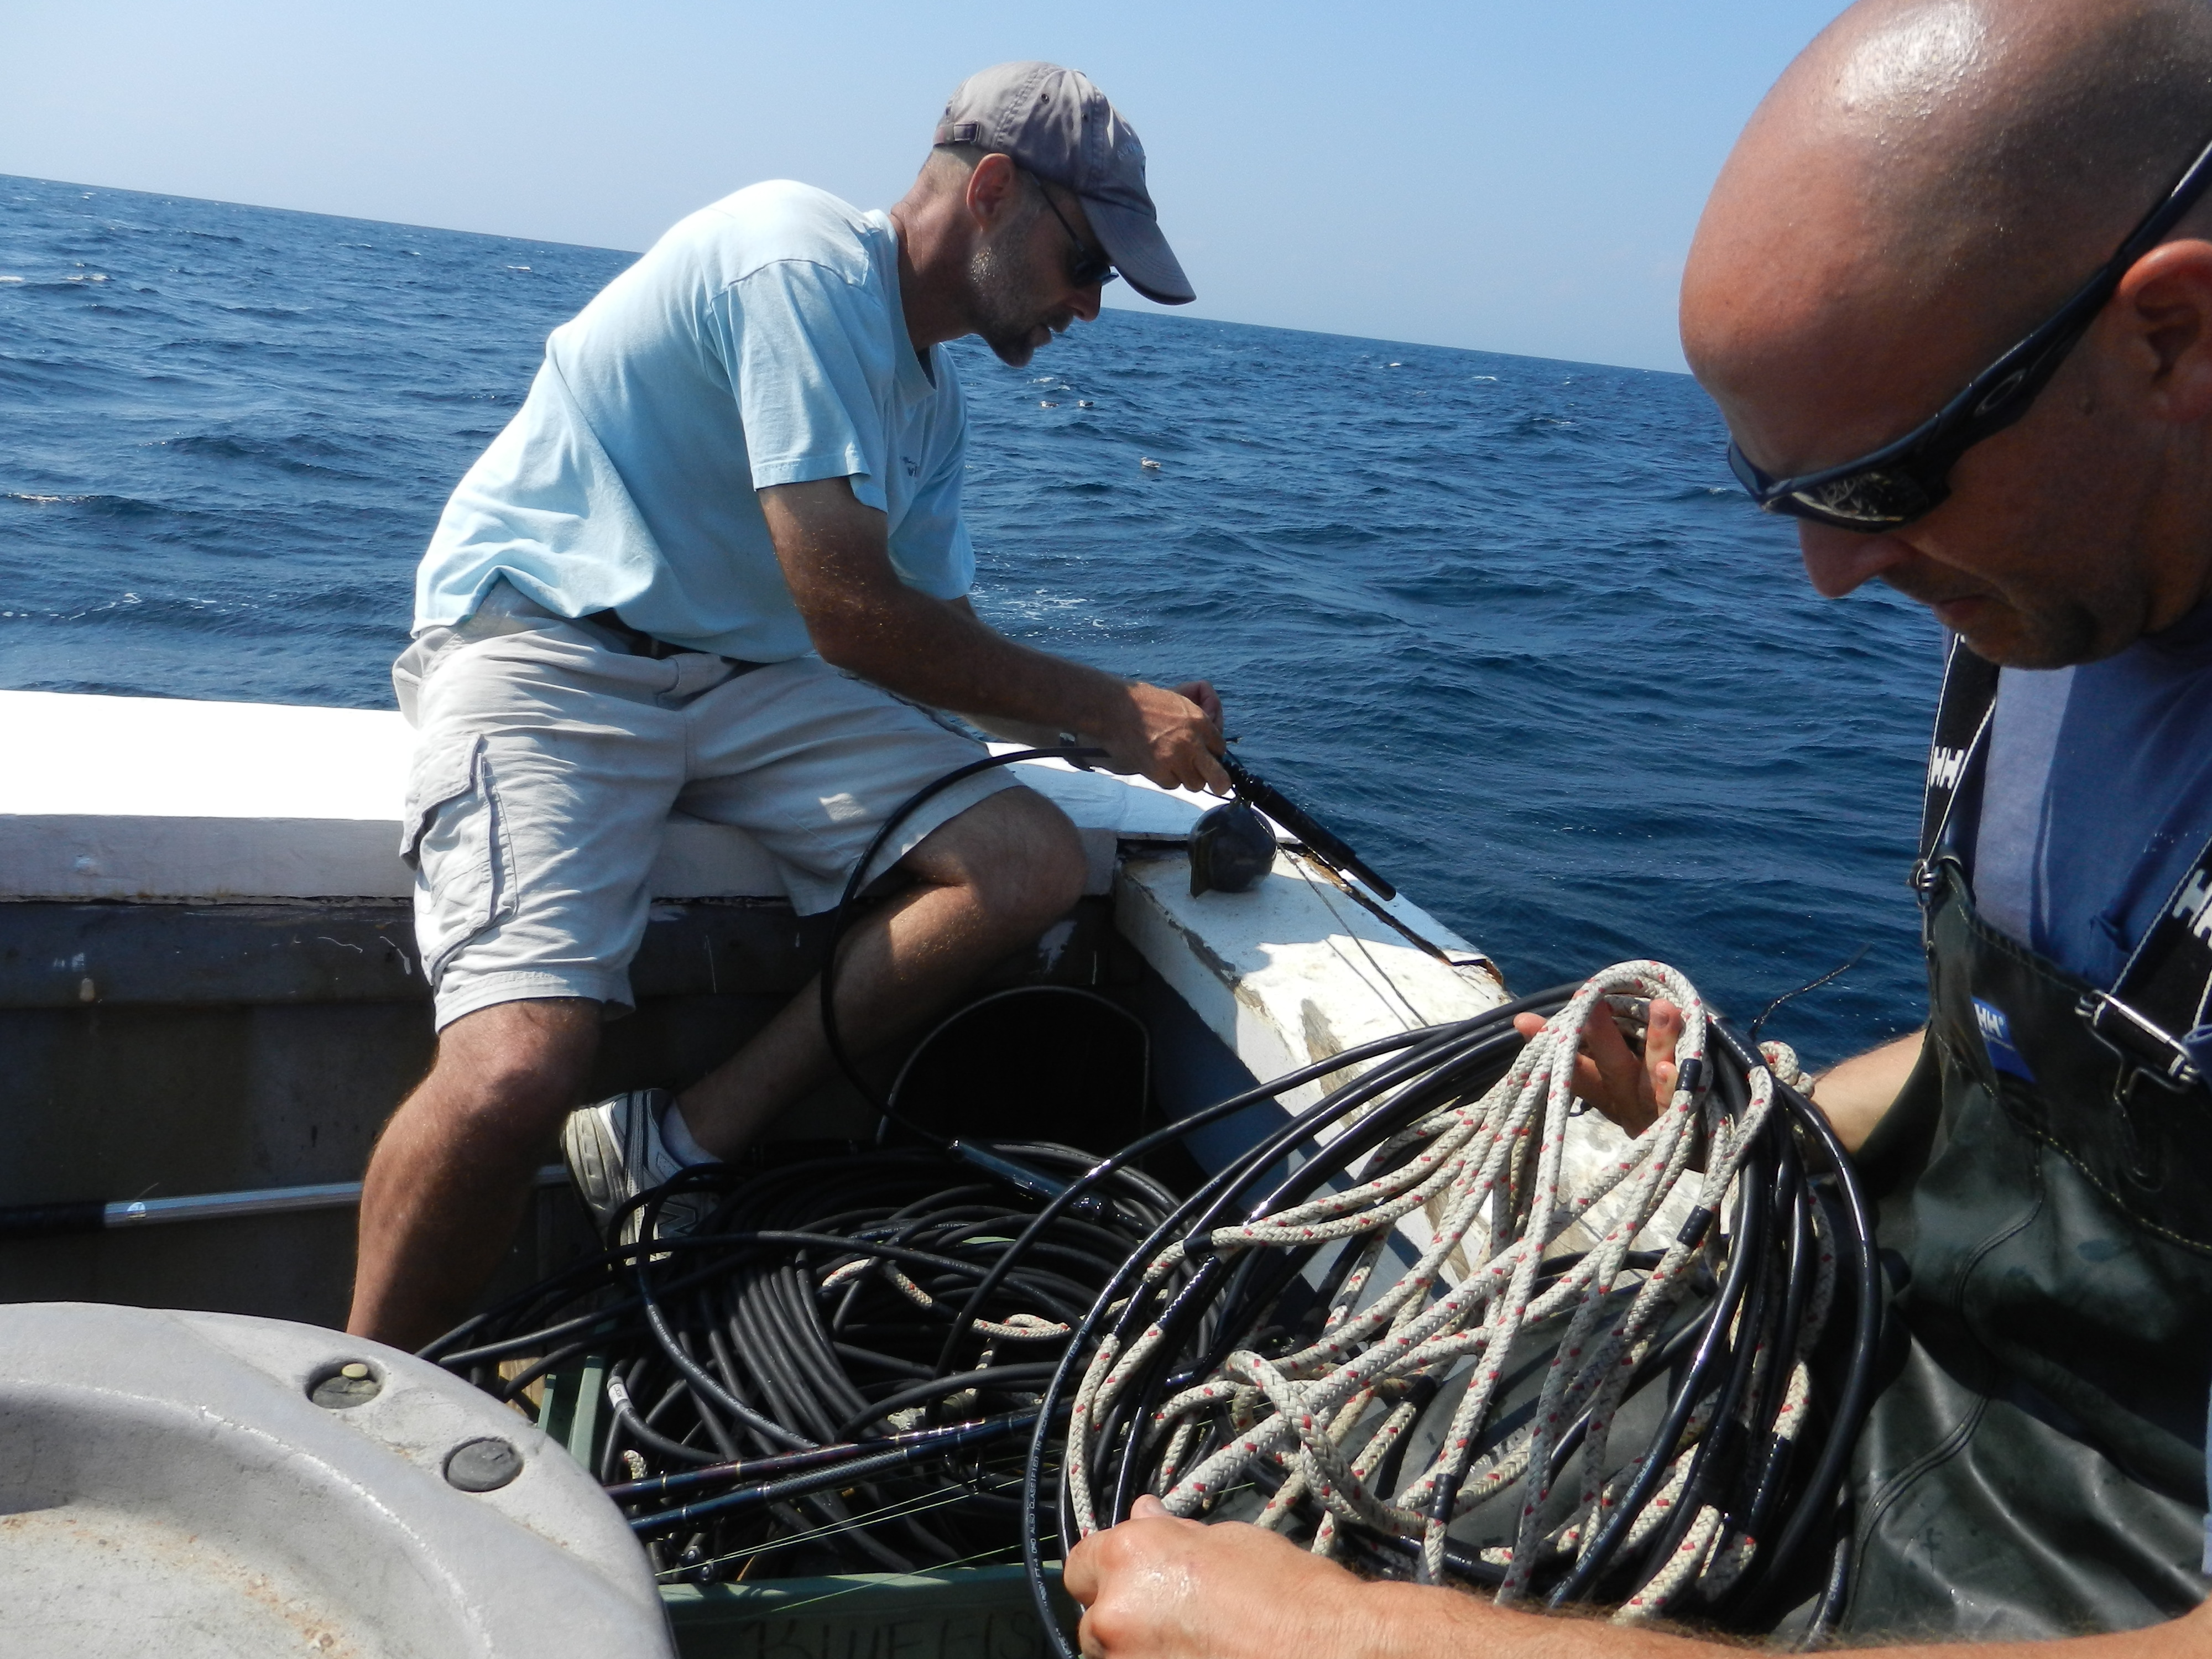
Motz and Mike lower the hydrophone cable into the water
3) Searching for tags with a hydrophone attached to the nose section of an autonomous underwater vehicle.
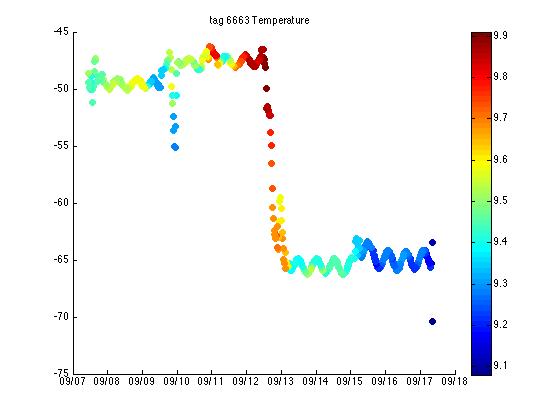
Searching with the REMUS (Hydroid’s Remote Environmental Monitoring Units) and the towed hydrophones behind the boat expands our search area. This way the vehicle can search one area while we search another. Additionally the REMUS can fly a certain distance off of the sea floor which can detect the tags at a closer distance vertically than a boat on the surface. This can come in handy when there might be a thermocline (the water is stratified by temperature) which might disrupt the acoustic signal from communicating between tag and hydrophone, or if the winter flounder is buried in the mud on the sea floor, being closer to the tag might have an advantage over detecting from the sea surface.
The hydrophone is on the nose cone and protected by a cage in case we crash into something
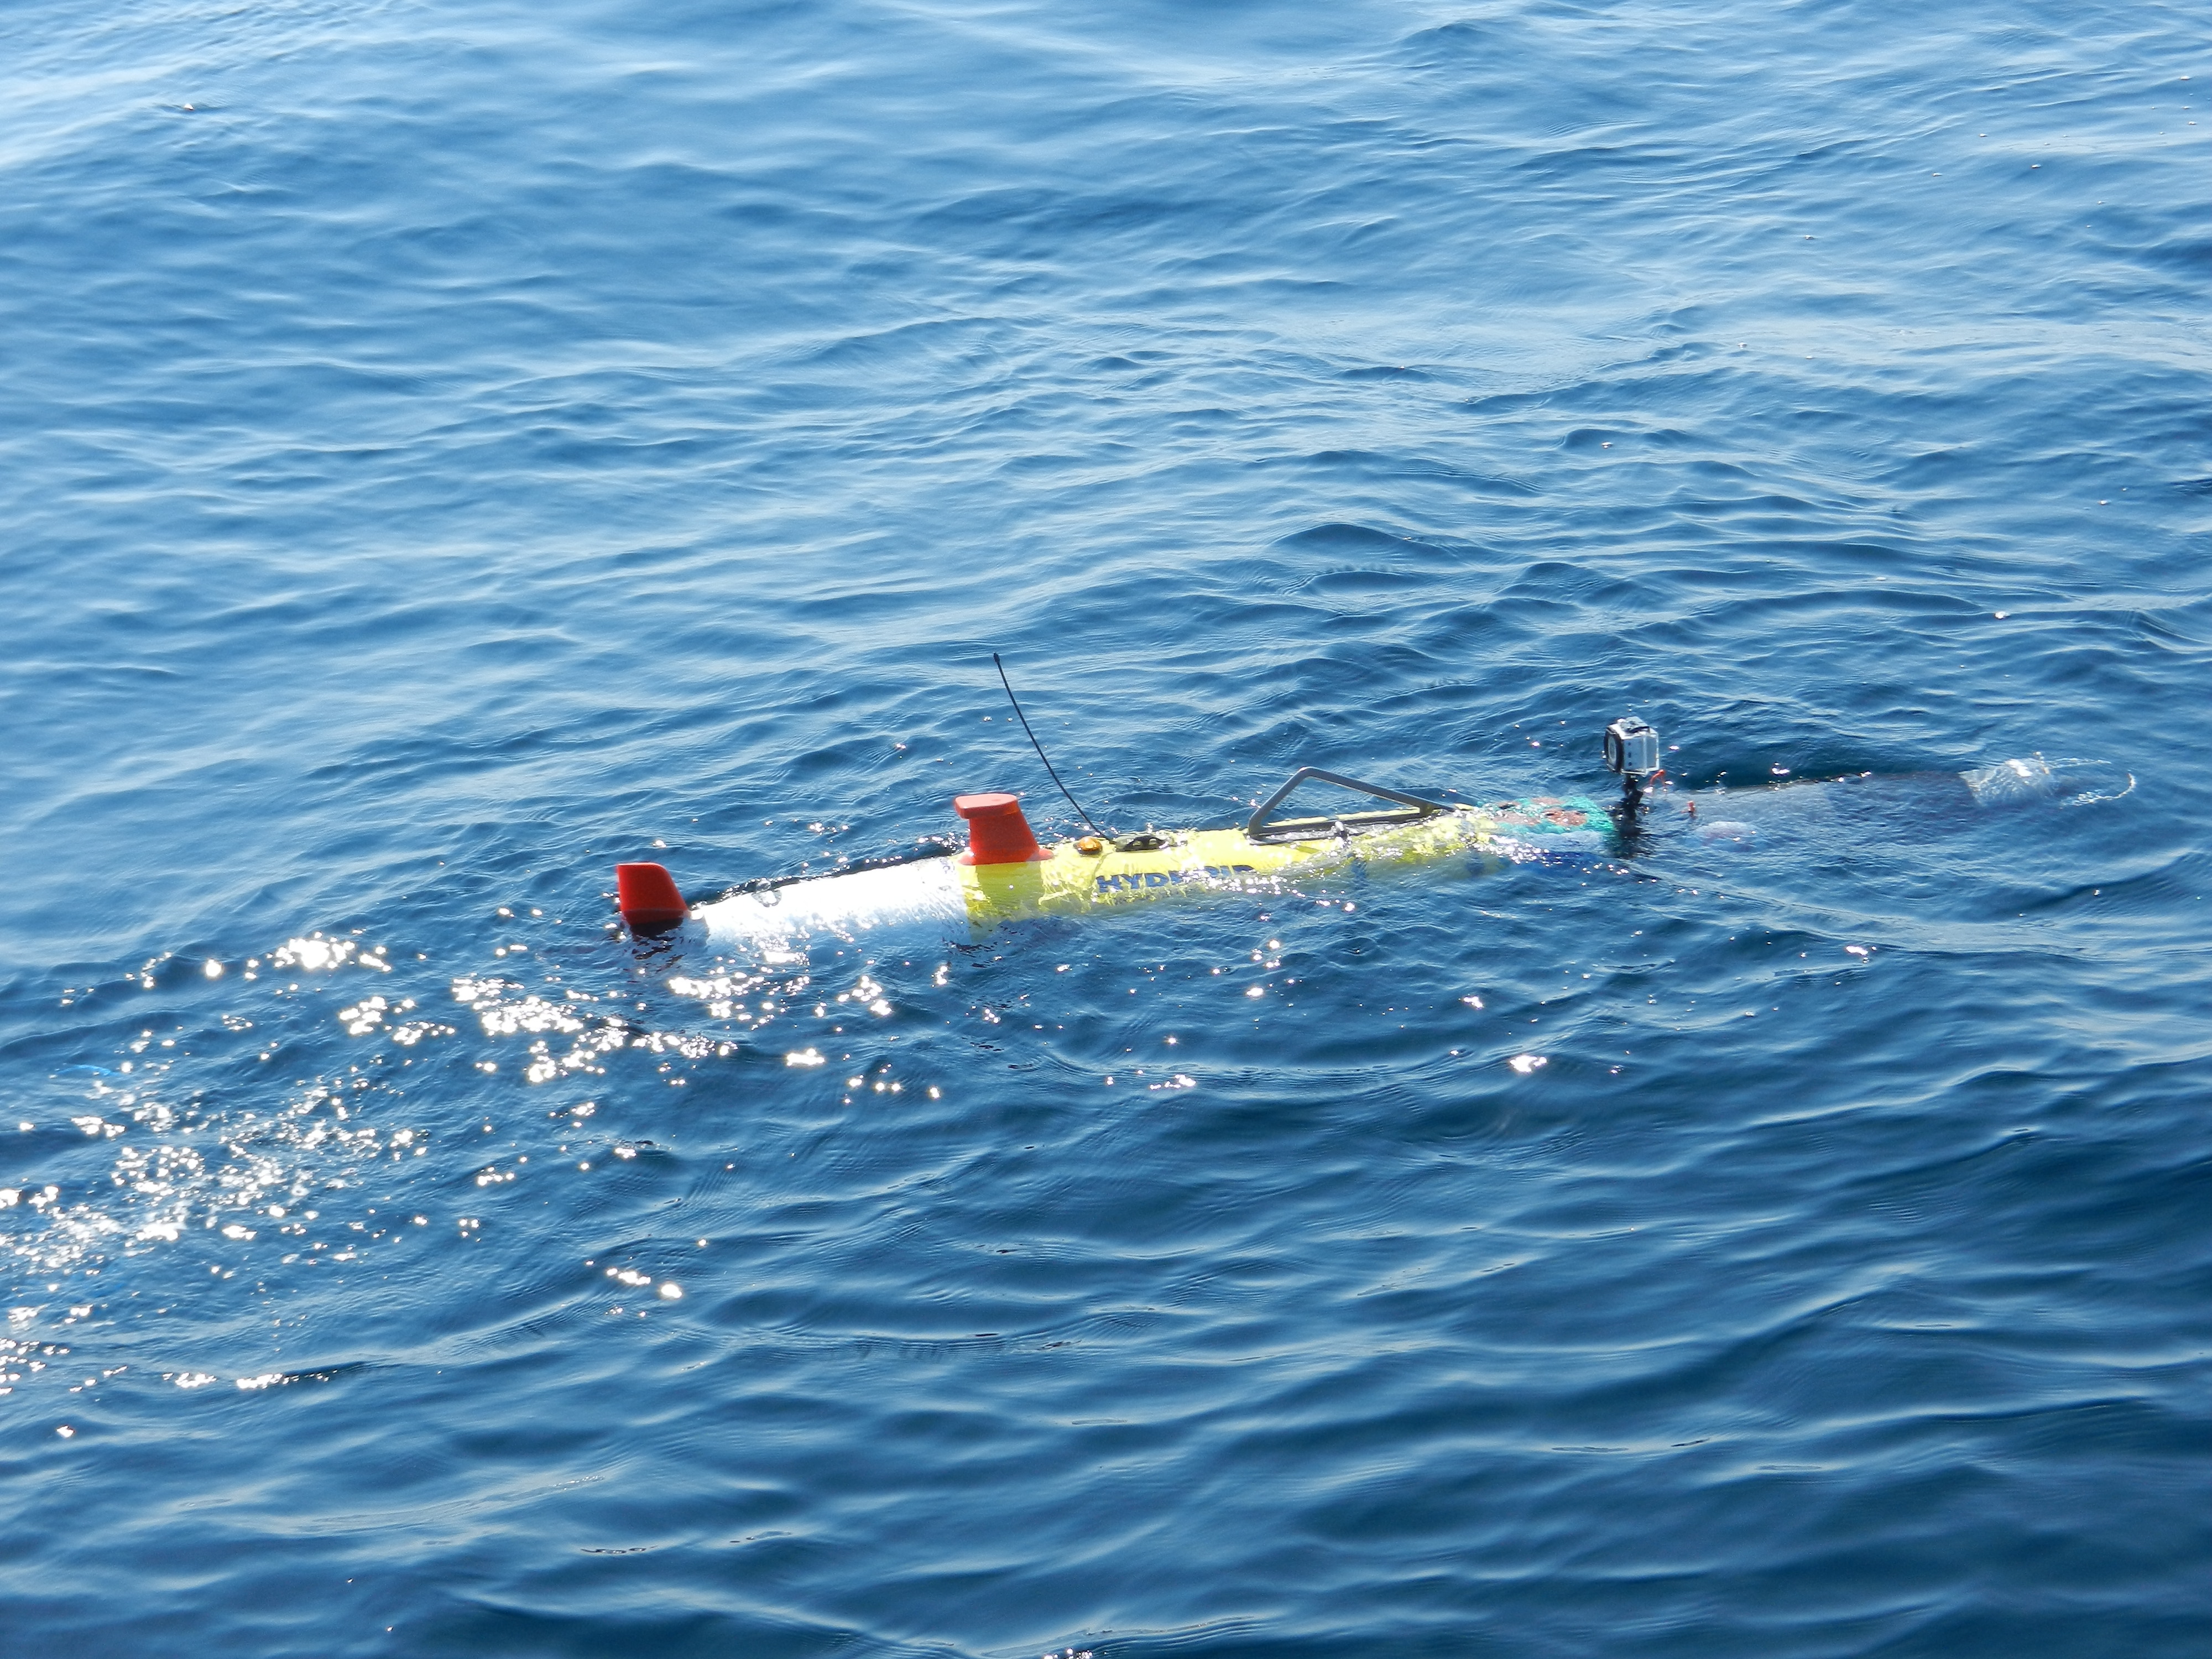
REMUS in the water
Expanding on the use of tags, the REMUS has a radio tag attached to the top of it so that we can hear when it comes to the surface. This comes in handy if its been at the surface for too long then we can track it down with its GPS point, but in case of drift we can find it with a radio antennae.
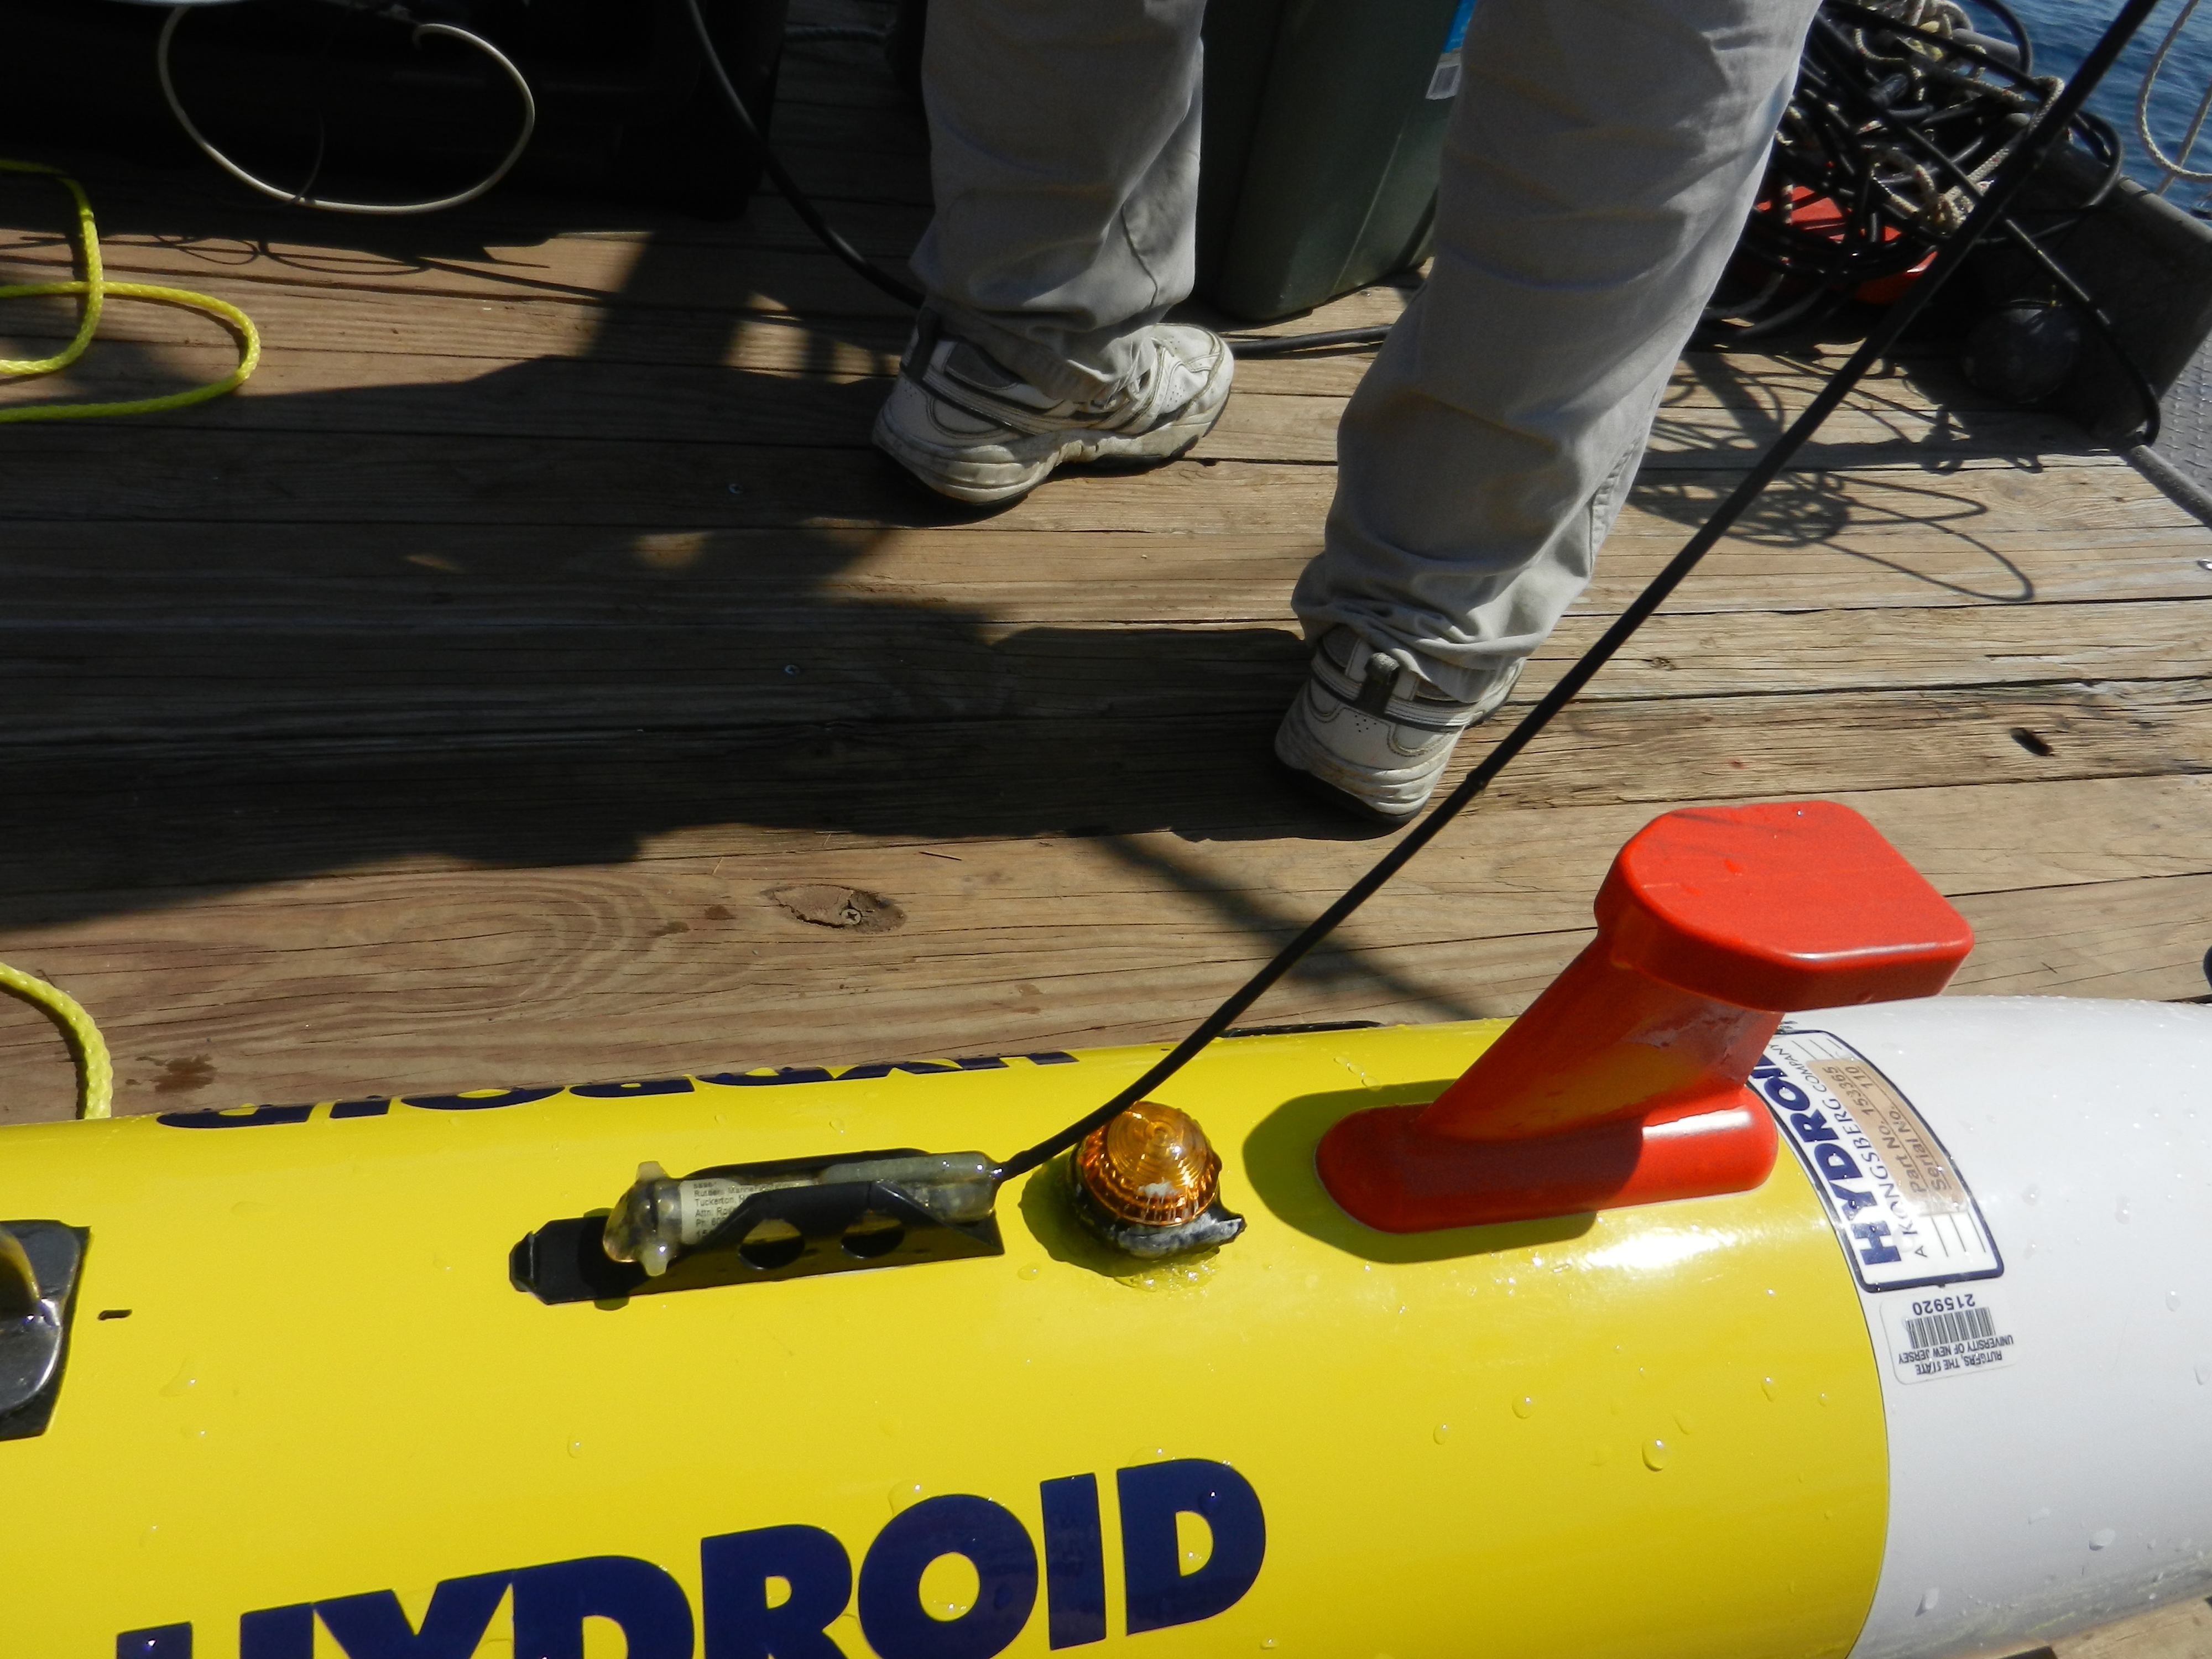
The radio tag on top of the REMUS
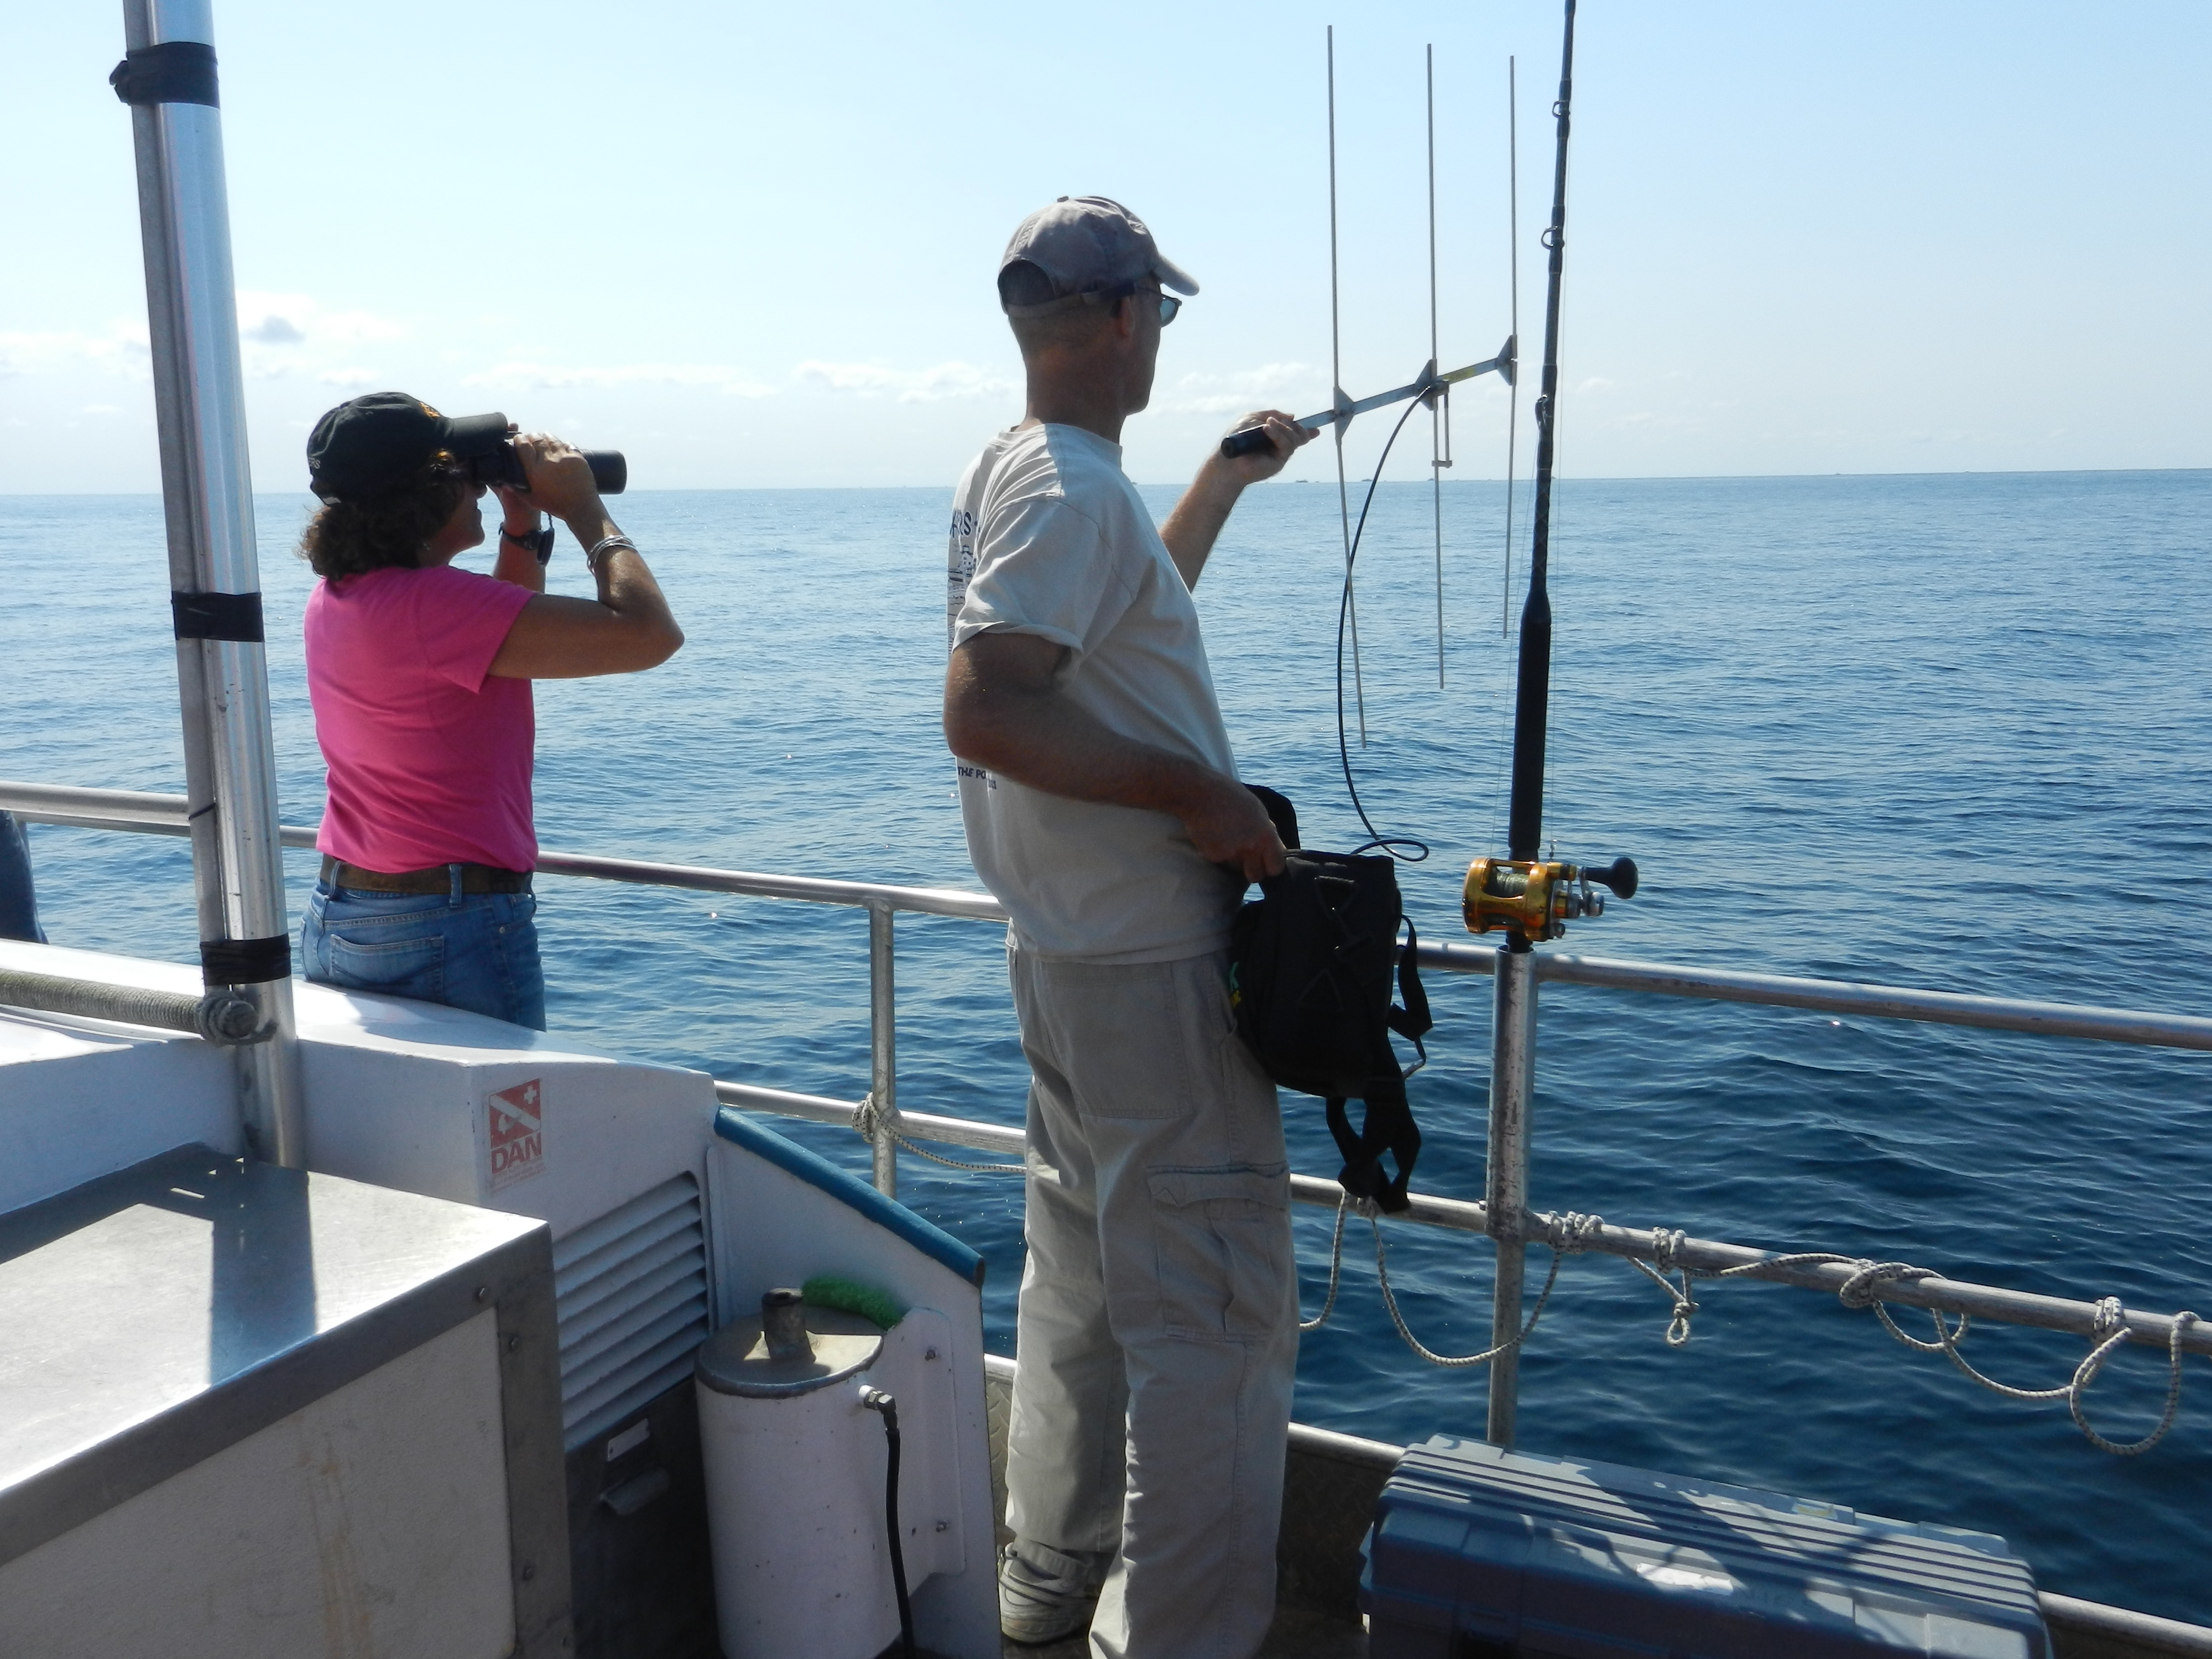
Rose searches for REMUS with binoculars while Motz gets a direction with the antennae